CorelDRAW: Basic Drawing Tools
Whether you're new to vector, or you're an Adobe Illustrator client extending your vector skylines, taking in the fundamental apparatuses of CorelDRAW is a commendable undertaking. We're going to begin with drawing instruments, for example, the Pen Tool, Freehand Tool and 3-Point Curve Tool, and additionally an audit of some regularly used dockers and toolbars.


1. The Pen Tool
Step 1
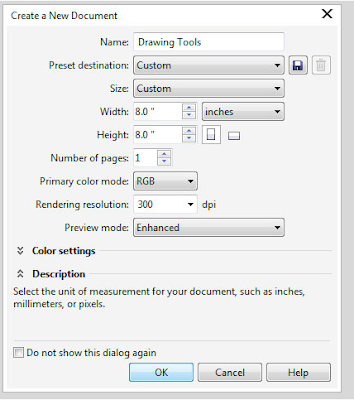
Begin by creating a New Document (Control-N) at your favored work measure (you can change this at whatever time while working), in RGB shading mode, and at 300 dpi. These are my favored settings, yet in the event that you'd rather work in CMYK for printing purposes, do as such (while recollecting to switch to RGB when trading for web utilize).

Step 2
We should begin with the Pen Tool (you'll see it in the Toolbox, to the left, under the Bézier Tool). This apparatus works simply like the Pen Tool discovered in Adobe Illustrator and Adobe Photoshop.
You put Nodes and attract bends fragments. We're going to begin with an adorable little phantom shape:
Put one Node and bend up and to one side. This is the begin of the tail.
Keep bending around to one side to frame the highest point of the phantom and withdraw to one side to join with the original Node. See that while you're setting grapple focuses, you get a see of the bend you're drawing. It's entirely useful.
You can alter your Node handles with the Shape Tool (F10), and you'll discover extra choices for altering inside the Property Bar (Window > Toolbars > Property Bar).

Step 3
To alter your recently drawn protest, go to Window > Dockers > Object Properties or hit Alt-Enter. In this docker you'll discover a grouping of choices for your chose protest.
For the motivations behind this instructional exercise, select Outline and change the width of your stroke to 2.0 pt, shading to dark, and both Cap and Corner for the Rounded choices.
Select the following alternative inside the docker, Fill, select Uniform Fill, and change the shading to white. We'll investigate different choices inside this docker in future instructional exercises and fast tips.

2. Freehand and Bézier Tools
Step 1
Utilizing the Freehand Tool (F5) is genuinely basic in case you're drawing with an illustrations tablet. Draw an extra apparition shape. Rather than picking where your Nodes show up, they'll be included consequently depending what level of Freehand Smoothing you've set in the Property Bar.
I began with a low setting of 12 for Freehand Smoothing. This illustration was rapidly drawn with a mouse. Take note of how it has a plenitude of Nodes and is entirely uneven fit as a fiddle.
I changed the Freehand Smoothing setting to 97. Once more, this was drawn rapidly with my mouse. It has 3 Nodes altogether.
Take note of how smooth the second, protest is contrasted with the first. Your settings in the Property Bar matter a lot when utilizing drawing devices as a part of this program.

Step 2
Since we have a second little phantom, we need its stroke and fill ascribes to coordinate. Rather than changing the new question's qualities in the Object Properties docker, utilize the Attributes Eyedropper found inside the Toolbox.
Select the primary apparition with the eyedropper.
Select the second phantom, and the greater part of its properties are replicated over into the second shape. For amazingly basic articles like those seen beneath this appears to be not really justified, despite all the trouble, however when you're utilizing an assortment of straightforwardness, angle, and mixing mode settings it'll spare you such a great amount of time over the long haul when you have to make comparable things inside your work of art.

Step 3
To delineate the further utilization of drawing devices, we'll work with the Bézier Tool to draw a face onto the primary phantom. Likewise with the Pen Tool, you attract bends fragments.
Begin with a little mouth. Draw a bend that plunges descending. Hit Enter or Shift to stop the bend.
Rehash for the eyes. Change the heaviness of all lines attracted the Object Properties docker.
I lean toward the Pen Tool over the Bézier Tool for shapes like the ones made for the second face: two interesting little circle eyes and a wide, open mouth. You'll notice it's hard to draw bending shapes that stop strongly at a Node and move into the following bend. Which instrument you use for tasks will rely on upon your necessities in drawing.
Set the Fill shading to dark for each of the three new shapes.

3. B-Spline and Smart Drawing Tools
Step 1
These little apparitions require crowns. Utilizing the B-Spline Tool, begin with a line that bends to one side and up. See that the further internal to the middle you put your Nodes, the more bended your edges and corners get to be.
The shape drawn beneath has 7 Nodes altogether. Set the Fill shading to brilliant orange in the Object Properties docker.

Step 2
The Smart Drawing Tool (Shift-S) is entirely like the Freehand Smoothing alternatives of the Freehand Tool.
In the Property Bar, you'll discover two choices with drop-down menus: Shape Recognition Level and Smart Smoothing Level. To begin, set both to None.
With both level choices set to None, I've drawn another basic and fast apparition like shape with my mouse. It pauses for a minute for the keen attracting to stack. Take note of how uneven and Node-filled it is.
Set both level alternatives to Highest and redraw similar shape. Take note of how smooth and basic it is with only 2 Nodes.
See the distinction between the two shapes and the extremes of their settings beneath.

4. 2-Point Line and 3-Point Curve Tools
Step 1
We're going to give the phantoms a long past due rest and draw a bug catching network with the last two devices we'll audit in this instructional exercise.
Begin with the 2-Point Line Tool and draw a long vertical line. In the Object Properties docker, change the line weight to 3.0 pt, shading to dark, and Cap and Corner to Rounded.
Keep the vertical line chose and begin the even line at the top Node. This will proceed with the protest without drawing another one.
Draw four more slender, inclining lines transmitting outward from the edge of the past object. Group (Control-G) your articles together.


Step 2
Utilizing the 3-Point Curve Tool, begin on the top level line and attract a straight line to meet the main inclining line (this makes the initial two focuses).
Next, the line will bend toward the side of the spider web (this makes the third point). Set the width of the line at 1.5 pt.
Keep drawing bended lines between every area of the web. Whenever possible, select a bended line and proceed with it by grabbing an open Node and making another 3-Point Curve.
Your web is finished when every segment is loaded with bends.

Step 3
At last, here's a brisk audit of the Object Manager docker. This docker is practically identical to the Layers board in Adobe Illustrator. On account of the Object Manager, be that as it may, you can not just make numerous articles, layers, and gatherings of layers (and questions), additionally different pages.
Take note of that beside every layer there are three symbols:
Appear or Hide: Toggling this progressions the perceivability of a layer inside the dynamic record.
Empower or Disable Printing or Exporting: Toggling this progressions regardless of whether a layer will be incorporated into a printed or sent out record. Regardless of the possibility that you have a layer covered up, if this isn't flipped off, your traded picture will in any case demonstrate whatever is on the layer.
Bolt or Unlock: Toggling this takes into consideration your layer to be editable or not. It's entirely valuable for ensuring objects stay untouched while working with various, covering components inside an archive.
Unfortunately, singular protests or question bunches must be on particular layers on the off chance that you need some to be concealed, some to be unprintable, or some to be bolted.

Great Job, You're Done!
For the time being, at any rate. You've figured out how to utilize different drawing apparatuses within CorelDRAW, for example, the Pen Tool, B-Spline Tool, and the 3-Point Curve Tool, and acquainted yourself with a few toolbars and dockers. This is only the tip of the ice shelf, so we'll have more CorelDRAW instructional exercises in the coming weeks. Meanwhile, demonstrate to us what you've drawn with these instruments in the remarks beneath!


Comments
Post a Comment